
 Search


Mapping a drive in Windows is one of those essential skills everyone should know how to perform. Whether you are at home or at the office, there are many useful reasons to map a drive. It may sound complicated, but it’s actually really simple to do.
Mapping a drive means that you want permanent access to a folder that is currently residing on another computer, server, or network storage device. Windows will assign a new drive letter to the folder and it can be accessed just like any other drive connected to your computer. Mapped drives usually remain connected through shutdowns, restarts, etc.
In this article, I’ll explain how you can map a drive in Windows XP, Vista, 7, 8, 10 and even via the command prompt. Before you map a drive, however, you’ll obviously need to create the shared folder on the computer, server or network storage device.

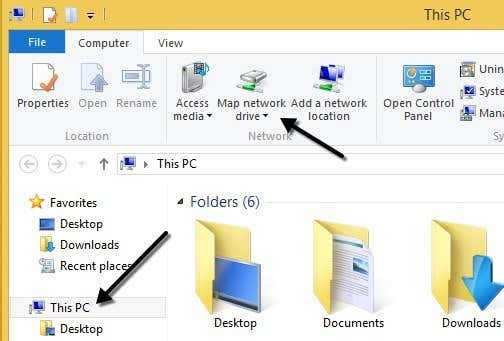
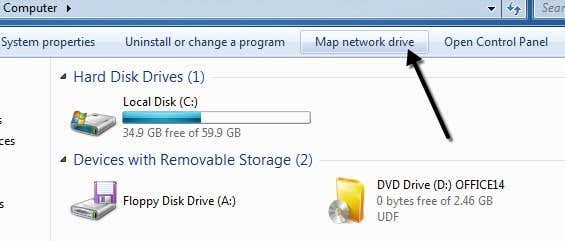 In Windows 8 and Windows 10, Explorer has gotten a bit of a makeover with the new ribbon interface that is used in Microsoft Office. Click on This PC from the desktop and then on the Computer tab, you will see a Map network drive button in the middle of the Network section.


Mapping a drive means that you want permanent access to a folder that is currently residing on another computer, server, or network storage device. Windows will assign a new drive letter to the folder and it can be accessed just like any other drive connected to your computer. Mapped drives usually remain connected through shutdowns, restarts, etc.
In this article, I’ll explain how you can map a drive in Windows XP, Vista, 7, 8, 10 and even via the command prompt. Before you map a drive, however, you’ll obviously need to create the shared folder on the computer, server or network storage device.
Map a Drive in Windows XP
Open My Computer and click on the Tools menu option. From the drop down list, choose Map Network Drive.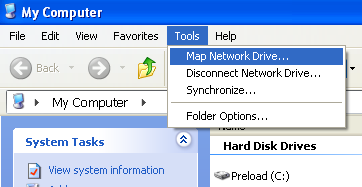
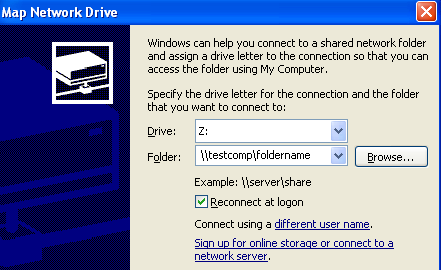
Pick a drive letter that you want to use to access the shared folder and then type in the UNC path to the folder. UNC path is just a special format for pointing to a folder on another computer. You first use two slashes “\\”, followed by the computer name and then another “\” followed by the shared folder name, \\testcomp\foldername.

Obviously, you’ll need to first share a folder off the server or network device before you try to map it. Click on “Reconnect at logon” to make the connection permanent, which means the drive will remain mapped even after you restart the computer.
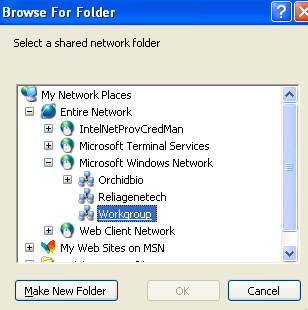
If you’re not sure what the name of the shared folder is, you can click on Browse and try to find the computer that way. Click on Entire Network, then Microsoft Windows Network and then expand out the workgroup or domain that your computer is in.

If there are any shared folders on a computer, you will be able to see them here by expanding each computer individually. Click Finish and you now have a mapped drive!
If you prefer, you can also use the IP address of the server or computer instead of the DNS name. For example, you can type in \\192.168.1.25\folder to connect to a shared folder on that machine. If you’re not sure how to find the IP address for a computer, check out my tutorial on using the command prompt that teaches you how.
Map a Drive in Windows Vista, 7, 8, 10
Mapping a network drive in Vista, 7 and 8 is slightly different than in XP, but also very simple. First, click on Computer from your Start Menu or Desktop. You’ll see a couple of buttons across the top, one of them being “Map network drive“.
Other than the cleaner looking interface starting from Vista, all of the options are the same as in XP! Choose a drive letter, type in the folder path, choose “Reconnect at logon” and click Finish!
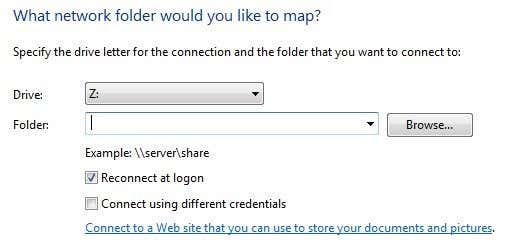
If you need to use a different set of credentials to connect to the shared folder, check the Connect using different credentials box. In domain environments, you probably won’t have to ever use this option because your domain login will most likely already have access to the server. If you have a NAS at home, for example, and are trying to map a drive to a shared folder, then you’ll probably need to type in the credentials set on the NAS as the Windows credentials won’t work.
Remember, the shared folder can be located on a local or remote server and you can use the IP address instead of the computer name if you like.
Map a Drive using Command Prompt
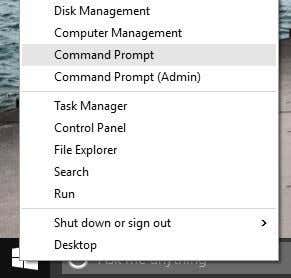
To open the command prompt, click on Start, Run and then type cmd in the Open box. In Windows 8 and 10, just right-click on the Start button and choose Command Prompt.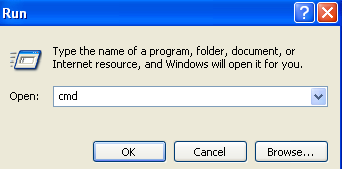
Then type the following DOS command to map the network drive, where x: is the drive letter you want to assign to the shared folder.
net use x: \\computer name\sharename

If you need to pass in a different set of credentials, you can specify the user parameter in the command as shown below.
net use x: \\computer name\sharename /user username password
In order to make the connection to the shared folder permanent, you need to add the /P parameter. This will ensure the drive will remain even after a restart. In some versions of Windows, you may have to use /PERSISTENT instead of /P.
net use x: \\computer name\sharename /P:Yes
You can delete a mapped network drive using the command prompt by typing in the command below. You can delete all mapped drives in one go using the * instead of a drive letter.
That’s all there is to it. If you have any problems mapping a drive in Windows, post a comment. Enjoy!net use x: /deletenet use * /delete